Wednesday, March 27, 2024

Why not start a native plant garden?

Native Gelsemium
Native Gelsemium

Nature flourishes all around us. It’s no wonder. The native plants and wildlife are well-adapted to thrive in our localities. Native plants proliferate because the soil, climate and moisture meet their exact needs, and they have natural defenses against pests and diseases. Native wildlife and plants “grew up together”, so to speak. They have natural affinities. Native plants provide those things which wild things need for continuing existence: food, shelter, and places to reproduce. They’ve been prospering together for millenia.

Yet, we often struggle to grow non-native plants in our gardens. Why work so hard? Start a native plant garden. Because they are naturally adapted, they don’t need the care that many non-native plants require.  Furthermore, landscaping with native plants benefits the local environment and its wildlife, too.

Native plants are those which exist naturally in the environment and were not introduced by humans.  How do you tell, though, which are native plants, and which are not? Sometimes it’s hard to determine, especially when invasive non-native species have taken over.

Begin by observing your surroundings. Check out the soil, moisture levels, sun exposure, trees, shrubs, vines, forbs, and grass-like things. Even the “weeds.” Write stuff down, especially noting flowers, attractive seeds, leaves, branches and bark, and where plants are growing.

If you can’t identify your native plants, get a book on the subject from your local library, or buy one. I have several texts on native plants of the southeastern United States. No doubt there are similar books for your region. There are probably smartphone apps to aid in plant identification. The National Wildlife Federation has a neat tool, Native Plant Finder, that allows you to enter your zip code to discover appropriate plants.

As with any garden, determine the correct location, or use whatever limited area is available to you. Take the soil type, sun exposure, and moisture level into account, then choose your plants accordingly.

Prepare the soil as you would for any garden or landscape. Begin with a soil test. Add amendments and cultivate it, if recommended. You might remove existing grasses and weeds, unless some of the weeds are native and desirable.

Principles of garden design are pretty much the same for a native plant garden as for any other. Install plants with similar requirements together. Stagger bloom times and other seasons of interest so you always have something lovely going on in your space.

To incorporate your native plant garden into the landscape, consider using locally sourced elements that say something about your region to give a sense of place. These might include shells and stone, boulders, sculptures, farm implements, or historical features.

Over time, you should find that your native plant garden requires less care than conventional plantings because the inhabitants actually belong there!

Return to GoGardenNow.

Monday, March 18, 2024

How to plant your new bare root perennials, vines and ground covers.

 Bare root liriope

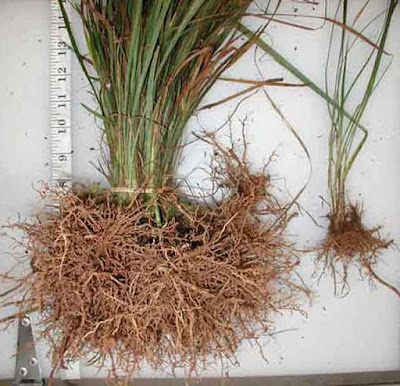
Bare root planting is an excellent way to establish a lot of plants at a very reasonable cost, usually priced at much less than container grown plants. Certain steps, however, are necessary to ensure success.

When your plants are delivered, they should find them bundled and wrapped in a moist medium, such as sphagnum moss or paper. Since there is no soil around the roots to provide protection, they must not be allowed to dry out. When the plants arrive, open the box as soon as possible. Set the bundles upright in the box. Protect the package from exposure to wind, sun, freezing temperatures. Keep slightly moist. Plant immediately. If that’s not possible, keep the package stored for a very few days as directed.

The day before planting, inspect the roots. If they’ve dried, plunge them in water for a few hours to re-hydrated. When planting, continue protecting the plants from the elements. A few minutes root exposure can be damaging.

Have the soil prepared and the holes "punched" in the ground before you begin. We recommend using a dibble or garden trowel with depth markings etched for guidance. Cover the roots after planting each one. Water well after planting to set the soil in contact with the roots.

Do not allow synthetic fertilizer granules to contact the plants above or below the soil line.

A thin layer of mulch may be added to aid in moisture retention and weed control.

Return to GoGardenNow.

FAQ: What is a dibble?

Dibble image by Davie Bicker from Pixabay
Basket, dibble and garden trowel

A dibble (aka dibber) is little more than a pointed stick used to aid in planting rooted cuttings, small transplants, seeds and bulbs. 

They are usually made of wood, metal, plastic, or a combination of materials about 1.5” to 2” diameter and varied lengths. Most have simple handles such as knobs, pistol grips, t-handles or stirrup handles. Some have horizontal markings etched or carved into the lower end of the shaft for uniform depth control.

The invention of dibbles is obscure, though undoubtedly it happened in ancient times across regions and cultures when our ancestors thought of a better way to make little holes in the ground than poking them with their fingers. Then, when they got tired of laboring on their hands and knees, longer dibbles were designed for working from a standing or walking position. 

 Ancient dibbler

Two-person teams of dibblers are known to have been employed. One dibbled while the other dabbled. Perhaps representing an evolutionary regression, most modern garden dibbles are short and dibblers often work alone.

As with all tools, dibbles should be cleaned of soil after using to prevent rust, corrosion or rotting.

Return to GoGardenNow.

Thursday, March 7, 2024

Call Before You Dig!

 Shovel image by Poor_photographer from Pixabay

Call before you...WHAT?

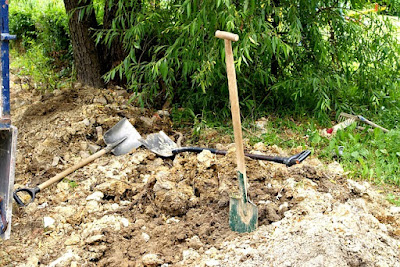
‘Tis a season for planting. Homeowners are gearing up for improving their properties, making plans, buying trees and shrubs, and maybe even installing irrigation, fences or mailboxes. No doubt, this will involve digging holes or trenches.

Before you begin, you'd better find out what you're getting into. There could be electric power lines, outdoor lighting, conduits, gas lines, fuel oil pipes, buried telephone or internet cables, fiber optics, potable water or irrigation pipes/valves, sewage/drain pipes. You don’t want to cut through any of those. Accidents, some with very serious consequences, can occur if safety isn’t heeded, including explosions, flooding, electrocutions. Make a list of all utilities and contractors that you THINK might be involved.

Mark the specific area(s) where you’ll be working, so utilities aren’t flagging or painting your entire yard.

To find out utility locations, Dial 811 - Call Before You Dig, to make “a locate request.” It shouldn’t cost you anything, but it might. (Get that settled up-front.) The call center will contact all utilities in your area that subscribe to this service. You should receive a confirmation “ticket” or some such communication telling you which services have been contacted. Bear in mind, though, that not all utilities or contractors subscribe to this service! If you suspect that a utility wasn’t included on the list, double-check. Personally call the contractor, if necessary.

Here are a few of the most neglectful or uninformed contractors:

  • Cable TV companies;
  • Invisible dog fence installers;
  • Irrigation contractors;
  • Security firms.

In some cases they have no idea where their lines were buried. “It was so long ago…”

Utilities and contractors that have been notified must come to your property to mark their lines, usually with flags or paint, within a specified period of time particular to your state or area.

The markings are color-coded.

Red: Electric power lines, cables or conduit, and lighting cables.
Yellow: Gas, oil, steam, petroleum, or gaseous materials.
Orange: Communication, alarm or signal lines, cables or conduits, and fiber.
Blue: Potable water.
Purple: Slurry, irrigation and reclaimed water.
Green: Sewers, drainage facilities or other drain lines.

Once you’ve waited the few days required, check your list to confirm that the notified utilities have responded. If some didn’t, report it.

When you’ve done everything required for your safety, proceed with caution. Be sure not to dig where markings have been displayed. Dig promptly before the markings disappear due to wind, rain or landscape maintenance. Avoid surprises.


Return to GoGardenNow.


Saturday, March 2, 2024

How to use less soil and save money in your raised bed garden.

 Raised bed with filler

Though raised-bed gardening is an excellent way to grow flowers and vegetables, it can require a large initial investment. Whether you construct it yourself or buy it in kit form, the materials come at no small price, unless you’re scrounging around for scraps.

Add to that the cost of soil. A typical 4’ x 8’ x 1’ box will require 32 sq. ft. of soil. To confuse (obfuscate?) matters, commercially available soils may be sold in liters, square feet, square yards, cubic feet, cubic yards or quarts. One nationally advertised brand sells for around $11.00 for 1.5 cubic feet. If you knew what you’d be spending beforehand, you’d be gobsmacked.

Get out your calculator and search the internet for a formula to convert your square feet to whatever. UnitConverters.net is a good place to start. You’ll need to do this if you aim to budget ahead and find the best deal on soil.

Once you’ve figured out how much soil you’ll need, divide that by about one-half. That’s right! That’s how much soil you’ll actually need if you follow my advice.

A gardening technique that is gaining a lot of attention with thrifty gardeners is called Hügelkultur. It literally means “mound culture.” The authentic form involves building a mound with decaying wood, brush and leaves covered with soil. After a period of time, vegetables and ornamentals are planted. Advantages are many. Burning isn’t needed, nor are other means of disposal. More or less permanent garden features are established. Decaying organic material provides abundant nutrients. Rainfall runoff can be better controlled. Garden soil drainage will be enhanced. NOTE: As with many things, advantages can be limited.

The hügelkultur method can be modified for use in raised beds. Simply collect organic yard waste, and half-fill your raised bed structure. This will save you a whole lot of money!

Over time, the filler debris will decompose, and the soil level will sink somewhat. That’s to be expected. But the addition of mulch and humus season after season will tend to offset the shrinkage.

I believe you’ll find the hügelkultur method to be much to your liking. If you’d like to learn more about the history and proponents of Hügelkultur, check out works by Josef "Sepp" Holzer, Rudolf Steiner, James Paris, Luke Potter, and Herrman Andrä, among others.

Return to GoGardenNow.